|
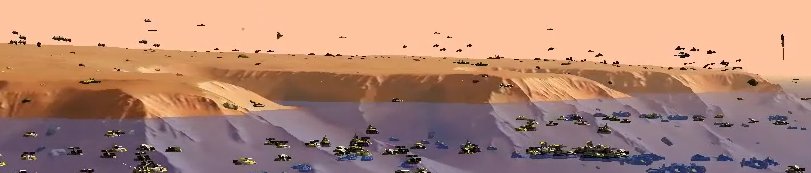
Introduction[MARS] Total Warfare is a real-time strategy game with an economy system that is meant to be simple, yet challenging. The battles, which tend to be remarkably large and intense, unfold on maps derived from real Martian satellite photos with associated topographical data. The ability to join and play any battle, including battles in progress, makes it easy business to get going. Battles can be created by anyone, and customized in a whole range of aspects. Players will fight versus tower-defense style AI or human teams in order to gain control over the richest parts of the red planet!
LoginMatchmaking is managed through Executive Lounge, which is the first part of Total Warfare you will encounter.Assuming that you are using Steam, login is fully automatic. You can however login without Steam by using the CTRL key during launch. After login, you will be greeted with a welcome chat message, that among other things will reveal your current permissions - FREE2PLAY, PLAYER or SUPERVISOR. User interfaceExecutive Lounge is divided into three major sections. The Players list on the left shows all connected players. The Battles list in the middle shows all battles created by players. The Chat, combined with a menu, is on the right side. The three sections are always visible, but may be automatically resized to accomodate certain functions, e.g. those available via the menu buttons.
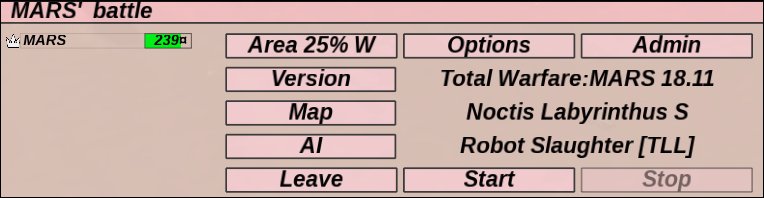
This very minimalistic UI does not make use of the right mouse button. Single-click is used for all UI elements, with one exception: When a list item selection is intended to invoke a command or close a dialog, a double-click is required. Some battles and other UI elements may be grayed, which indicates they are not accessible. It is usually possible to click or double-click the grayed element to find out more about the reason. Player and battle status, and certain player permissions, can be figured out by looking at the icons displayed on the left-hand side of the lists. For example, crown icons mean the player has more or less elevated permissions, or that the battle was created by such a player. Battle setupAfter joining or creating a battle, the Battle panel is displayed below the Players and Battles lists. The leftmost part of the panel shows players that have joined the battle room, plus a gauge showing the estimated player skill (if known). On top of the gauge, any credit balance greater than zero will be displayed.Starting from here is easy, and involves choosing Starting area and Map and possibly setting up AI and Options (such as AI difficulty). Note that there is an implied voting system employed throughout the battle configuration process. If multiple players are in the battleroom, a majority vote may be required to change settings. Free2Play players are also (currently) restricted from modifying any battles created by others. After the configuration is satisfactory, the Start/Fight button is the only thing that stands between you and some real carnage!
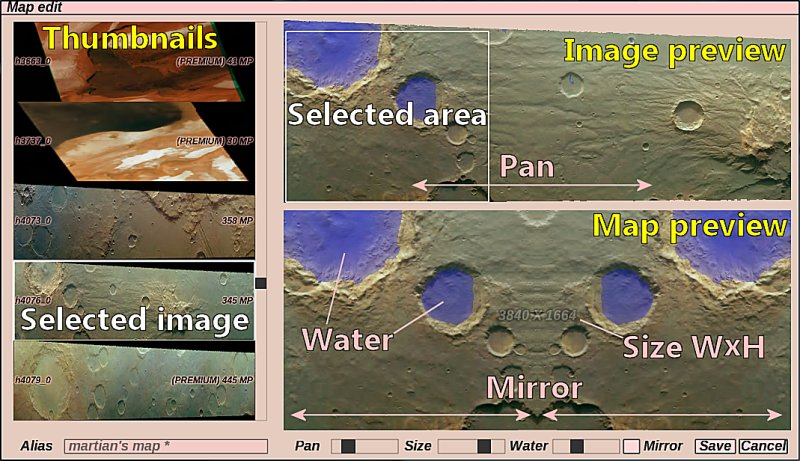
Custom mapsBefore starting the battle, you may be interested to try one of the very special features found within the game - that allows an almost endless variety when it comes to maps. If you are just looking for some quick action, please skip to the next section!The Maps window has a Create button that allows maps to be created based on a library of nearly 1200 satellite images. The leftmost portion will display Thumbnails of these images, and when clicking the thumbnail a larger Image preview will appear in the upper right corner. Each thumbnail will also display the pixel resolution (in MegaPixels) of the corresponding satellite image, excluding any empty (black) pixels.
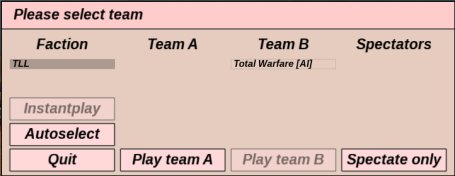
Progress will be announced in the Chat, and after a minute or two your map should be ready for use. Sorry to keep you waiting, but the amount of data that must be processed is usually large, with some images having nearly 2000 MP of resolution - more than 100 times higher than the typical smartphone camera. Roughly 30% of the satellite images contain imperfections (data transfer errors, lens flares, chromatic aberration, uneven color/brightness, overexposure, haze etc.) and have therefore been marked as PREMIUM content. To keep the overall quality of user-created maps as high as possible, we want to limit the use of anything that contains image artifacts. Should you still want to use these images, we kindly ask you to upgrade your account to PLAYER or SUPERVISOR. Thank you! The Maps window also has a Rename button that (depending on if your account allows it) will rename the selected map. Similarly, the Remove button will remove the selected map. You can only rename and remove your own created maps, highlighted in yellow. Battle startupWhen the battle has been started, the game will stream some data from remote servers, and then begins loading. If the game is already in progress, the fast forwarding will begin to playback the battle from start in order to reach a position in time where the actual game play is currently happening. You will soon be greeted with the team/faction selection UI. There is currently only one faction available, known as The LL, and unless you want to spectate, we recommend the InstantPlay or Autoselect options for team selection.
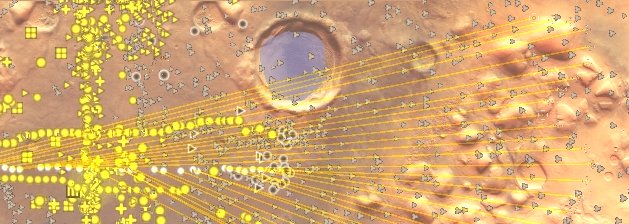
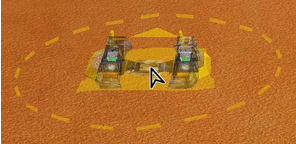
SpawnWhen you have finished fast forwarding and the team balance is such that you are allowed to start playing, the message Choose start position will appear at the center of the screen. Starting areas shown as rectangles on the map will also be displayed. The rectangle corresponding to your team is typically the one closest to the camera and colored the same as your player. Player colors, including your own color, can be seen in the list at the bottom right. Click inside the rectangle at the location where you would like to start. After a few seconds, your Executive Commander will be spawned and selected, and at the same time the camera will zoom in to show the starting location.
Note: If you are unlucky and don't survive for long, depending on team balance and settings it may be possible to respawn. You must either fight until all your mechs are dead, or press ESC two times in rapid succession and then click self-terminate to forcefully kill them. Selection/commandThe Executive Commander is a mech, and usually the most important one on the entire battlefield. Although the Total Warfare arsenal consists of submarines, ships, vehicles, hovercraft, robots, aircraft and various building structures, they are all referred to as "mechs". Mechs are selected using click/drag with the left mouse button, and a click with the right mouse button will deselect all. With multiple selected mechs, a drag with the right mouse button will draw a formation line of arbitrary shape, commonly used to position mechs at (or attack) points along the line. With one or more selected mechs, the command menu is shown to the left of the screen. Commands are issued by clicking the menu buttons, and depending on the command you may then need to click/drag on a location on the map or on an (allied/enemy) mech. If no command has been manually issued, a context sensitive default command will be used and the appearance of the mouse cursor changes accordingly. Note: If you ever played the classic RTS game Total Annihilation, many controls are similar - give it a try!
Camera/overviewSituational awareness is very important throughout the battle. The camera zoom should be set using the mouse wheel so that a fair share of the map can be seen - as much as possible without negatively affecting the ability to see mechs or issue commands accurately. Different tasks will in many cases require different zoom levels, and proper camera tilt angle (CTRL + mouse wheel) can be important for spotting incoming enemies early.The Tab key depressed will enable the map overview mode that shows the entire battlefield with mechs displayed as icons. Although the command menu is hidden in this mode, commands can still be issued, and new commands can be selected via keyboard controls (see the Controls topic), without releasing the Tab key. If this is still not good enough, Backquote (the key above Tab) can be held to force hide/show the menu. The overview mode will also stick if Backquote is held while pressing Tab, and Tab can then be pressed to return to normal map view.
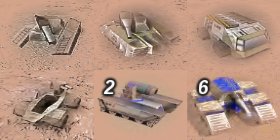
The overview is particularly useful when dealing with commands that are supposed to cover a large area (e.g. extract) or commands that may need to be issued far away (e.g. patrol) since it eliminates the need to zoom out manually. The overview also shows the current camera position and the direction it is pointed - the camera can be moved around the map by holding the middle mouse button. ConstructionTo build mechs, first select a mech that has construction capability and click the desired build icon in the menu. If the constructor is a factory production should start immediately, and the icons can be pressed multiple times with left/right mouse to add/remove build commands. For non-factories, it will be necessary to click on the map to specify where the mech should be built, and by holding SHIFT multiple build locations can be added. Rough terrain can however be a problem - a rectangle under the build location with same color as your player indicates the location is buildable. Note: The use of a factory rally-point and a patrol route can be very important to ensure newly produced mechs are instantly put to good use. Give the factory a move command, followed by several patrol commands holding SHIFT.
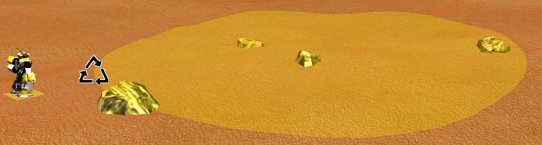
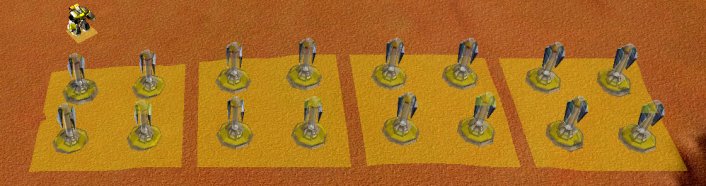
Hover the mouse over any button in the command menu to see a command description in the lower left corner of the screen. Minerals extractionAround the map, you will see pieces of minerals scattered, usually with higher abundance in lower terrain (including under water). To obtain metals from these minerals, you may use the Extract command (drag the mouse to define an extraction area).The extract command can also be given to a factory to make all newly constructed mechs instantly start extraction. New players are recommended to use the Setup auto-extraction button to automatically issue the commands required for the factory to continuously extract minerals, while advanced players may want to configure it manually. The metals obtained, combined with energy, will be used to build your army. Although extracting minerals is easy, doing it over a very large area, and in the most efficient manner, is very hard and key to winning the battle. The Executive Commander is important mainly because it can be upgraded multiple times and then used to create extracting builders that automatically collect minerals over a large radius. The Metals economy part of the Help (F1) gives a brief overview of the build/upgrade chain involved in the minerals collection. Any "construction" mech capable of building at various locations on the map, can also extract minerals. Most of them are also able to build a short-range extracting builder tower. Like the name implies, extracting builders will also assist any ongoing construction that is within range.
Energy managementThe commander supplies enough energy to get started, but additional energy will soon be required. Without enough energy, some facilities cease to function and production rates can be much slower than normal. At the beginning of the game, natural energy coming from buildable solar collectors, tidal and wind power is of key importance. Subsequently, it is advisable to build geothermal and advanced power reactors. The Energy economy part of the Help (F1) is meant to give an overview of the build chain involved in the energy supply.
WarfareMechs positioned strategically well or on patrol rarely need to be told what to attack - they will do it automatically. An explicit Attack command should typically only be given if certain high priority targets are approaching, or when firing at ground e.g. with artillery in situations where line-of-sight and radar coverage is absent or the radar has been jammed. Due to the very large amount of mechs commonly engaged in the battle, there is seldom enough time to micro-manage such attacks anyway, and targeting small and fast-moving mechs can be real tricky. Try to focus on the bigger picture instead, and use the many automation features provided to make your army as self-sustaining as possible! The army can be configured for defensive or offensive situations using the motion and weapon behavior settings, and aircraft to repair in airpad when damaged.For AI play you should try to get the highest possible score, by inflicting the most damage and kills during the main stage, and defeating the boss in the final challenge! Total Warfare keeps track of highscores on a per-map basis. The end objective for team multiplayer is to kill all the enemy. The player score is recorded, but is of less relevance here. Total Warfare estimates the player skill based on battles played and maintains a top-ranking list. Video tutorialsThe following tutorials explain the basics plus a few useful tricks to optimize your warfare
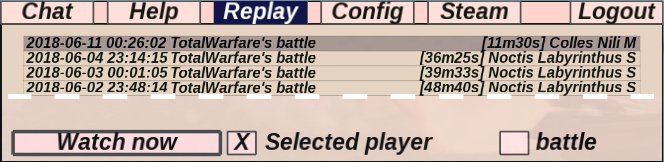
DiscordEconomyOn Steam, Total Warfare provides annual upgrades known as Player and Supervisor, each bundled with winnable credits that will benefit skilled players. The upgrades are valid for a minimum of one year from the date of purchase, after which a sustained Player upgrade is granted as long as the the credit balance is greater than zero. For a skilled player who is playing regularly, the end result is a validity that may be indefinite.Credits are taxed on a daily basis and won/lost by participating in games where other players who possess credits are playing. To prevent abuse, the methods used to iron out winners are not disclosed, but we advise you to try to play efficiently. Always play (and watch) the entire battle until end since quitters may not be eligible for awards or highscores. Players following these recommendations will also be safe from any possible cheating attempts. Battles with discrepancies will be dispatched to and handled by our validation servers. Highscores, awards and many other essential features require that Executive Lounge is running during the entire battle. Playing for credits can be fun, but is merely a bonus feature in Total Warfare - there are absolutely no warranties with regard to the correctness/fairness in credits being awarded or lost. ReplaysThe Replay list allows you to watch old battles. If you are curious why a specific team won the match or why some players received awards, replays can be extremely useful. They are also a powerful tool for acquiring new skills. Replays are either watched inside your current battle room, or in a dedicated replay room that will automatically be created for you if you have not joined any battle.Tick the Selected player checkbox to only list battles where the player currently selected in the Players list participated. Similarly, tick the battle checkbox to only list battles that were played in the battle room currently selected in the Battles list.
Use the Watch now button or a double-click in the list to launch the selected replay. Due to the relatively high burden that replays place on the Total Warfare infrastructure, they are a premium feature and currently require a Player or Supervisor upgrade. ChatThe chat window is used for battle chat and private messaging. It will also print notifications and error messages from the server.The chat window normally directs chat to the current battle via the Battle button. The PM (private message) button can be enabled by clicking a player in the battle participants or Players lists, or by double-clicking an entry in the chat history. As long as the last item in the chat history is selected, it will automatically scroll down to show new incoming messages. The entire history can also be erased using the Clear button. MiscA double-click in the battle participants list will (vote to) kick the selected player A double-click in the Players list will select the battle that the selected player has joined (if any). In the Battle panel, select a battle and then hold CTRL and press the Copy button to copy the currently selected battle instead of creating a new one.
In the Map edit window, select a map and then hold CTRL and press the Copy button to copy the currently selected map.
Hold CTRL and press Logout to disable Steam until next time you log out. Anonymous login (without Steam) involves leaving the username and password fields blank, but is not guaranteed to work and the account is to be considered temporary. Registered login (without Steam) requires a username and password of your choice to be manually entered. Don't forget the password - password recovery is not available. ControlsThe Keyboard controls part of the Help (F1) contains the most important stuff, with some more info below.
Generic command modifiers Production queue modifiers Attack command modifiers Special commandsThese commands/states can be issued to certain mechs but lack keyboard controls and are only accessible via menu buttons
Motion behavior settings Weapon behavior settings Return To Base airpad settings ConfigThis section describes the list items in the Config menu section of Executive Lounge.
Use the Defaults button to reset all configuration items to their defaults.
Troubleshooting
|